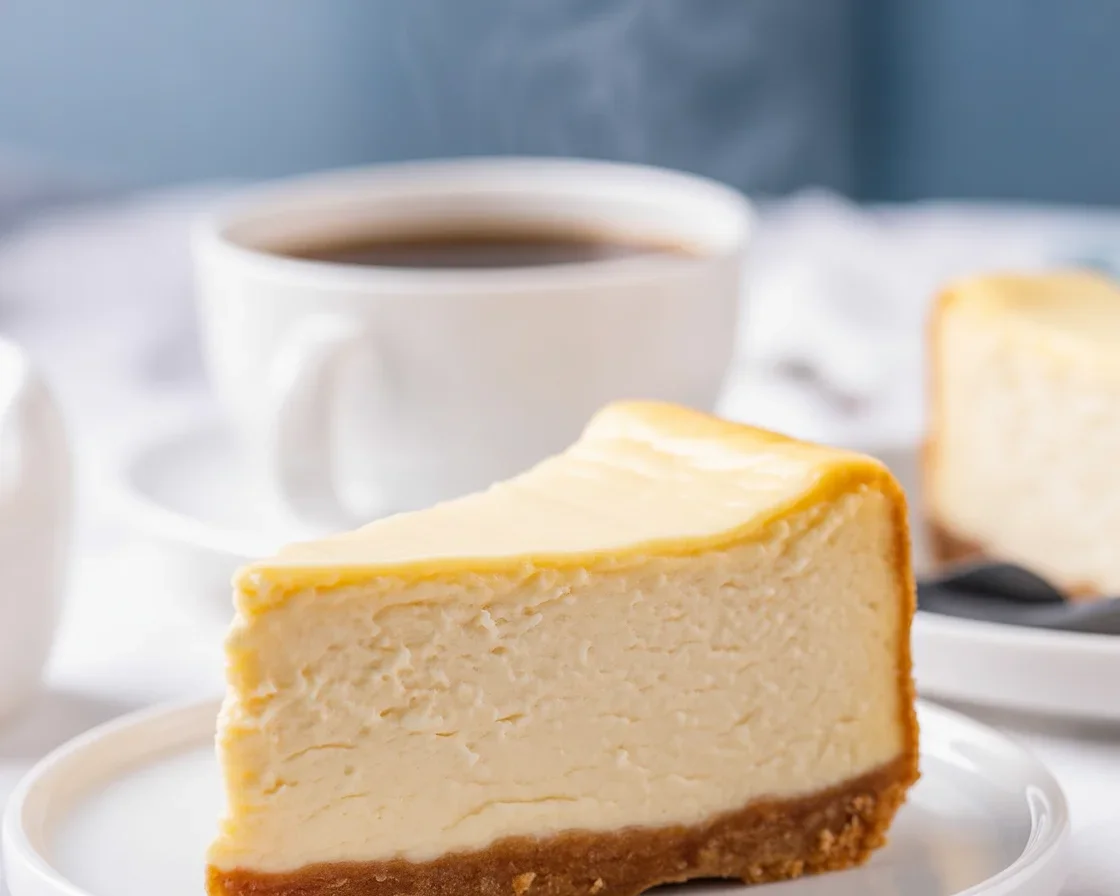
So, you want that classic New York style cheesecake recipe experience at home, huh? Yeah, I get it. I used to order cheesecake by the slice at diners, convinced I could never pull off that super rich, dense-yet-creamy thing myself. But guess what? You can totally do it. And, wild as it sounds, it’s easier than making lasagna or even a homemade pizza. Heck, if you like kitchen adventures, you might also enjoy this homemade pizza recipe for a change of pace. Anyway, let’s dive in. No fancy chef hat required. 
What You’ll Need To Make New York Cheesecake
Okay, let’s talk supplies before you’ve got your shopping list scribbled on the back of an old envelope. Here’s the rundown. First off, good cream cheese is your star. Go big brands here, honestly. It matters. Then you’ll want sugar (yep, straight-up white sugar does the trick), a few large eggs, and pure vanilla. Sour cream? Non-negotiable. I tried swapping with Greek yogurt once, and the result was…eh, not great, kinda thin.
Oh, crust fanatics—grab some graham crackers and real butter (none of that fake spread, please). My auntie used to mix in some cinnamon, which is nice but totally your call.
People sometimes ask what makes New York cheesecake different. It’s mainly that thick, tall, tangy filling. You get the height from a deeper pan and all that delicious richness from the eggs and sour cream.
“I’ve tried fussy cheesecakes from bakeries, but this homemade version beat them all. My family swears I joined a five-star restaurant’s kitchen!”
—Jenna R.

New York Cheesecake Baking Tips
I’ll save you from soggy crusts and weird lumpy bits. Here’s what I wish someone had told me the first time I tried to impress at a potluck.
Room temp EVERYTHING. Even the eggs. No exceptions. You throw cold cheese into your mix, you’re asking for a bumpy ride.
Mix it, don’t beat it to death. Gentle, slow—barely get it creamy and stop. Think lazy Sunday, not turbo blenders. Over-mixing leads to puffy, cracked tops, and nobody wants Mount Cheesecake.
Bake with water in a roasting pan. Sounds weird? It works. Pop the cake (still in its springform!) inside another deep pan filled with hot water, and thank me later. Oh, and resist, like truly fight the urge, to open that oven until it’s nearly set. Every time you peek, you mess with that delicate temp.
Let it cool slow, too. My cousin once put hers straight in the fridge, and it shrank like a sweater in the dryer. Yikes.

Equipment to Bake a New York Cheesecake at Home
Okay so technically, you could do this with just any old pan but do yourself a favor—snag a springform pan. Non-stick is nice. I found mine at a thrift store for five bucks, honest.
You’ll also want:
- A big mixing bowl (that hand mixer helps, but get ready for a little arm work)
- Parchment paper—keeps the crust from clinging for dear life
- Measuring cups and spoons, obviously
- Roasting pan for that water bath (a deep cake tin works in a pinch)
Also, don’t sweat it if your oven is a little finicky. Just check on your cheesecake near the end; a little jiggle in the middle is perfect, like JELL-O not a milkshake. That’s how you know not to overbake.
Secrets to a Creamy Cheesecake
I’m going to level with you: a lot of folks get hung up on lumpy cheese or a weird texture. You don’t have to settle for that. Here’s the plot twist—the less you fuss, the creamier it’ll turn out. Sounds backwards, huh?
Trust the process. Use room temp cream cheese (yes, I’m repeating myself). Let your sour cream hang out on the counter for thirty minutes too. Mix until “just combined” but don’t whip it into oblivion.
Honestly, the hardest part is patience. You’ve got to chill that cheesecake for, say, six to eight hours—overnight’s best. Every time I cut early, the texture flopped. But the wait? Oh, so worth it.
Add-ins? If you’re a purist, skip ’em. But if berries or chocolate chips speak to you, gently fold them in last, so you don’t ruin that silky base.
Want more dessert ideas that push the boundaries? Take a look at this apple crisp cheesecake with caramel whipped topping for another must-try.
How to Prevent Cracking
Nothing feels more criminal than cracking your cheesecake right as you think you’re out of the woods. It happens. I’ve been there. Here’s what’s saved me lately:
- Don’t skip the water bath—yeah, you need it.
- Cool down gradually. Crack open the oven door a smidge and walk away for an hour. Trust me.
- Run a thin knife around the edge when it’s fresh out of the oven. It’s like giving your cheesecake a little breathing room.
Resist toppings right away—let your cake settle, chill out in the fridge, then go wild with fruit or whatever.
Common Questions
Can I make this cheesecake ahead of time?
Absolutely. I’d even say it’s better after 24 hours in the fridge. More flavor, more “wow.”
Do I need a special pan?
A springform makes it easier, but a deep, round cake pan will work if you line it well with parchment (just don’t try to yank it out hot).
Can I freeze leftover cheesecake?
Heck yes. Slice it, wrap each piece, and thaw in the fridge. Tastes basically fresh.
Why did my cheesecake sink in the middle?
Could be over-mixing, or opening the oven too soon. As long as it’s baked through, a little dip just means more room for topping.
Any easy way to tell when it’s done?
Jiggle test! Center should wiggle a little. Edges will be firmer—don’t bake until it looks dry.
Ready To Bake Your Own Slice Of The Big Apple?
That’s everything you need to know for a knockout classic New York style cheesecake recipe at home. Just remember, it’s not about chasing perfection—some cracks or crumbles only make it yours. Try the tips I shared, have fun with the process, and let those sweet smells fill your kitchen. For more steps or if you’d rather watch, this Classic New York Cheesecake Recipe (Video) can help, plus you’ll find more inspiration in the Rich & Creamy New York Cheesecake WITH VIDEO | Butternut Bakery tutorial. Don’t let the big-city name fool you—this is pure comfort food, just like you see with this classic Salisbury steak with onion gravy. Promise, you got this. 

New York Cheesecake
Ingredients
Method
- Preheat the oven to 325°F (160°C).
- In a mixing bowl, combine graham cracker crumbs, melted butter, and ground cinnamon (if using).
- Press the mixture firmly into the bottom of a springform pan to form the crust.
- In a large mixing bowl, combine the softened cream cheese and sugar. Mix gently until just combined.
- Add the eggs one at a time, mixing gently after each addition until just combined.
- Stir in the vanilla extract and sour cream until smooth, avoiding over-mixing.
- Pour the cheesecake filling over the crust in the springform pan.
- Place the springform pan inside a larger roasting pan. Fill the roasting pan with hot water until it reaches halfway up the sides of the springform pan.
- Bake in the preheated oven for about 60 minutes, or until the center is slightly jiggly.
- Turn off the oven and crack the oven door. Allow the cheesecake to cool in the oven for 1 hour.
- Remove the cheesecake from the water bath and run a thin knife around the edge.
- Chill in the refrigerator for at least 6 hours, preferably overnight, before serving.

